23 Sept 2013

Weaving a tree on a paper plate.


(I made the clip using the Shadow Puppet app on my ipad, am just experimenting!) Written directions follow below:

THERE IS 
Colour in or paint the paper plate first with a suitable landscape scene or in a colour to complement your tree.

Depending on your options for colour choices/wool, these trees can be "magic" trees (ie colourful), or you can use appropriate colours to create a spring tree or autumn tree etc...

Use a paper plate. Cut a wedge at the bottom and 15 ( or another uneven number) along the top of the plate.

Create your warp threads by placing the end of the wool in a small slot cut into the bottom wedge. Wrap the wool around the plate, placing each warp thread in each of the slots at the top. 

Finish the wrapping by tying the wool to the tail at the back. 


Starting at the top, weave your chosen threads into the warp threads, until you get about halfway down. 

To make the branches and trunk wrap a length of wool around two or three warp threads, eventually wrapping around the whole set of threads. 

Textured wool helps create more of a three-dimensional look to the tree. 

22 Sept 2013

Paper plate weaving


Something a bit different and the children absolutely loved it - even my most fidgety pupils sat still and concentrated for the time it took to work on these!

1. Cut an even number of triangles/points around the edge of the paper plate - on reflection we decided we had too many as had cut quite small and most pupils had created between 30-40 points - we would suggest about 20-22 points (it depends on how many warp threads you want, or how fiddly you are prepared to get).

2. Wrap the wool twice around the most central part (ie halfway points) of the plate to make two warp threads and tie them at the back. You should then have an uneven number of cuts on one side eg 11 and an even number of cuts eg 10 on the other side.  Make sure you have numbers that are consecutive eg 13-14 or 9-10 as this means your warp threads are in the middle.
The threads here need to be moved over to have the right number of cuts on each side of them.
Back view
3. Tie the warp threads together with the end of a ball of wool and begin wrapping the wool around the plate, beginning with the cut (V) that is on the side with the highest number of cuts and tie at the back when done.

4. Now tie a weft thread in the colour of your choice to the centre of the warp threads. Begin weaving over and under the warp threads - work near the outside edge of the plate so that it is easy to see what you are doing. 
After working about a third of the way round, gently pull the weft thread in close to the centre, then continue weaving.  When you get to the end of your weft thread, tie a new colour (or the same colour if you want a thicker stripe) to the end of the thread and continue with the under-over pattern. Tuck the tails under the weaving so they are out of sight.


21 Sept 2013

Just a couple of changes!

Have been out of the room for the past few weeks while my student teacher was in control. Gave me a chance to reflect on my own programme and plan for the term to come. I also observed a couple of the other teachers and sitting in someone else's room and checking out their layout is always good personal reflection too.  So have had a bit of rearrangement today ( not the reason I went to school today but that's what needed up happening - gotta do it when inspiration strikes!)

Corner to corner view from my desk by the front door...have joined the three large tables together, rearranged the desks...still have options of table/desk/floor seating for 26 pupils (and they start the day in one 'base' place but are free to move around during the day depending on their tasks)...

View from art bay...still plenty of room at the floor table (with cushions)....

Moved the computer cupboard and marking shelf over to the side wall...

Back wall now has a jellybean table where the kids can use three laptops or iPads, the inquiry table has moved to the centre, with the report books in the boxes beside it, and a small table is over near the library shelf (two pupils can work there easily with computers or iPads too).

Two bean bag chairs for pupils to work on and two desks in the art bay where pupils can sit to work or stand to do art if needed...

Just need to reshuffle a couple of the wall displays now and then will set up the D.I.Y. Programme again (my student worked a regular classroom timetable and guided group sessions).

Only one week left until holidays and we will be right into it all again in October!


15 Sept 2013

Amazing camouflage!

Check out this awesome video that shows how wonderfully an octopus uses camouflage...

Pen Licences!

The NZ/Aust Office Max website Colour My World is where you can create a handwriting pen licence for your pupils - it can be printed out and used/laminated/displayed etc.


I give the pupils the original (larger size) to take home; I put the middle sized copy on display in the classroom for quick reminders of who is allowed to use pen for writing (in all of their work except maths) and I laminate the smallest size for the pupils to keep in their pencil case as a personal reminder that they have a standard to uphold!


As an awesome bonus, the pupils will soon each receive in the mail their own little congratulatory pen pack thanks to the sponsors of the site (Office Max)! The small laminated licence is presented to the pupil when the pen pack arrives. Kids love it and it motivates the others to try to improve their writing style.

If a pupil's standard slips, then they have to hand over the licence - doesn't happen very often!


12 Sept 2013

Classroom layout and displays

Photos from the beginning of Term 3 2013:
Job list - pupil pictures are rotated weekly
Year Sixes have special school-wide jobs

My desk: by the front door, laptop runs the IWB
View along the windows
View along the IWB/whiteboard wall
View from front door, across classroom to cloakbay door - we have a mixture of options for seating -
pupils select a numbered counter when enter the room on Monday morning (corresponds to a workspace/seat/table)
and that is their 'base' space for the week.  They are allowed to move to other spots during the day eg when working with a partner or on an ipad, or if I want a guided group to be in a certain place.
Computer cupboard area
Marking shelf - pupils place books or completed work here for me to look at
Basket for the DIY (do-it-yourself) learning folders and resources; shelf for flag, stickers box, guided group resources.
Games cupboard (due for a paint-job!)
Literacy/spelling resources, atlases and large reference books.
Library corner
Inquiry display table, reporting books in boxes underneath
Inquiry wall - has question, key understandings, a relevant quote or two;
work or other material still to be added as inquiry progresses.
Personal learning goals display - wearing a motorbike helmet in honour of Burt Munro
Inside the computer cupboard
Guidelines on doors of computer cupboard


This lets me know who to respond to on their blog
School agreement for pupils using computers
A work in progress - poem of the week, current events
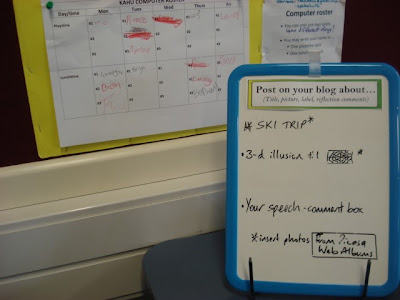
Suggestions board for what to blog about and a playtime/lunchtime computer roster
Bulldog clips attached to wall for displaying class-made publishing books.
Displaying the expectations of learning for writing.
Motivation for the Year Sixes towards the end of year prize-giving.
Wall shelves - homework books are kept each day in the empty space; modelling books to the right,
Bible in Schools books below, refill pads and handwriting cards,
maths text books at bottom - all within easy reach.
Maths equipment
As we have no desks we store our books for each subject in these bins.
The chairs get stacked at the end of the day.
We have some stools as an option.
Another version of stools.
Handwriting levels
Noise signal lights
Reward system - when board is full the dodecahedron dice (to 12) is rolled
and the winner chooses from the prize-box.
And for inappropriate behaviour...(steps two plus are hardly ever referred to thankfully!)
Guided groups on display
Low table, cushions are a seating option - due for paintjob too!
As we have no storage desks the pencil cases are kept in these trays;
everyone shares the rulers and glue-sticks.
The centre of the maths shelves/homework book shelves -
spelling and basic facts resources, literacy CDs, music CDs etc.
My personal collection of teaching resources, kept on shelves in the art bay.
More of my resources, on a higher shelf on other side of artbay.
More of my resources - the bits and pieces stuff!
Pupils can use these art supplies.
My everyday trolley - planning and resources for the week are easy to access.
Reward system - using obsolete library cards, points given for tidy handwriting as well as three points per day
as "work pay" for being at school.  Pupils can 'buy' from the shopping list.
My marking system for book work.
I use groups of three for cooperative tasks. Change each term.